
Adding Content
by Zoe Manderson
how to
Scroll
Delight your audience and entice them to engage with your itinerary.
Adding your hero content
We recommend that you add a unique narrative and hero image to every itinerary you curate. You will need to upload an image and copy to the overview page in the journey builder.

You have a few ways to add content to the rest of your itinerary


1. Direct Upload
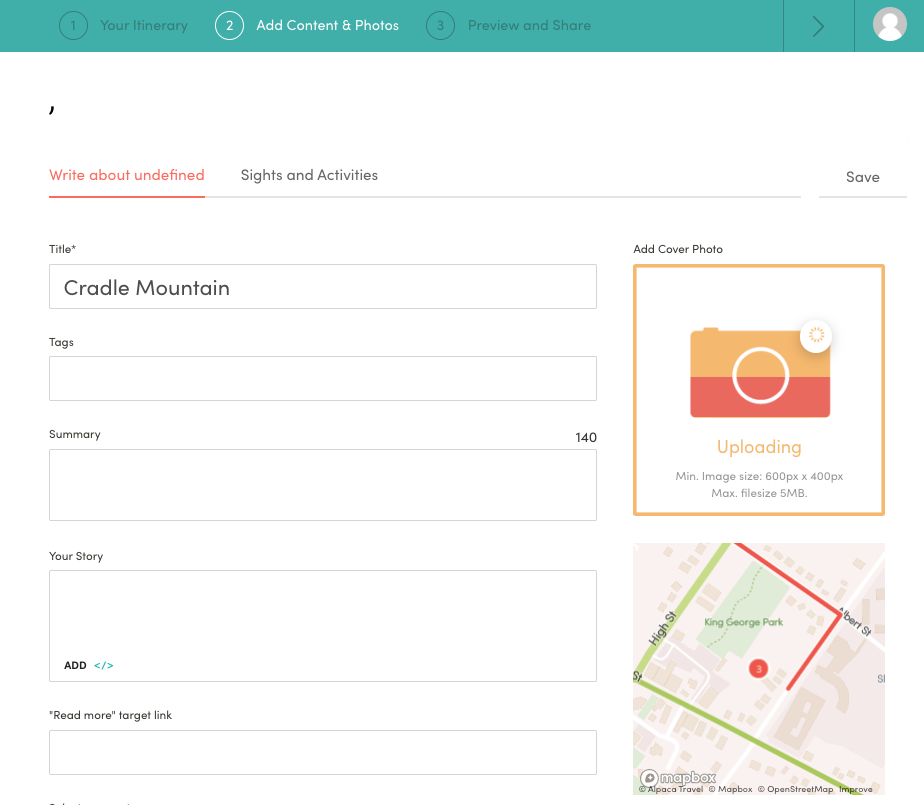
Click on the map point, then ‘Add content and images’. Fill in the blank fields and text boxes, upload your chosen images, then click Save.
2. Adding content from your Alpaca Library

If you manage your places within your Alpaca Library, then you can pull those listings into multiple itineraries. This means that you only have to enter a listing once (into your Library), and then you can include it across a range of itineraries that you curate.
To connect your Library to your Itinerary Builder, go to the “Map Information” page and scroll down until you find the field titled “Collection ID”. Then, go to your Library and copy the last section of the URL (a mixture of letters and numbers – this is your Collection ID) and paste into the “Collection ID” field within your journey.
You then plot the place within the Itinerary Builder. Note that the title/name of the place must exactly match in both the Library and the Itinerary Builder for the content to automatically pull through. It will not display the content in the back end, but you should see it on the front end once you refresh your map.
You will have to add the Collection ID to each itinerary you create.
3. Adding from ATDW

If you have an ATDW distributor licence, Alpaca can connect it to your itinerary builder. Use the ATDW toggle when searching for places to add them directly from ATDW’s database.
Please note that because this content is from ATDW, you will not see it display in the back end of your itinerary, it will appear blank.
Add points of interest markers along your route
You can add points of interest in the same ways as outlined above. When viewing a destination you’ve added, click on the ‘Sights and Activities’ tab under any destination you’ve added.
